DIY your own mask at Home

Warning: Cotton masks are primarily used as an alternative in order to save the Surgical and N95 masks for Health workers and COVID19 infected patients. A cotton mask is used to defend oneself and the people around them from the virus. One should only wear a cotton mask when one knows that they aren’t infected, or maybe an asymptomatic carrier. While a surgical mask is needed when one is infected and clearly shows symptoms.
Things you will need
- A t-shirt/ wide piece of cotton fabric
- A piece of Silk/Chiffon fabric
- Scissors
- Pencil & Scale
- Thread
- Fabric Pins
There are endless possibilities of how you can reuse and recycle items that are just laying around the house. As all of us need to stay behind the four walls during this time of crisis, this is the perfect way to take some minutes to yourself and surf through your house and closet to make something creative!
Here is an easy tutorial of how to make your own DIY mask at home from an old T-shirt. DIY masks can be really useful, especially for little kids, when you cannot go to the store to buy one or can’t find the right size for yourself.
So, go grab your favorite pair of scissors and your old sewing kit because it’s time to DIY!
Step 1: Picking the right Fabric
Firstly, pick your shirt, or cotton fabric, to make your mask.
In order to pick the right kind of fabric, make sure that the fabric already has a thick consistency of its quality. It should be dense and thick enough for you to just be able to breathe, yet no direct wind passes by when you heavily blow through it. It is always best to use a couple of layers of cotton fabric with extra added layers of silk and chiffon fabric in between for extra protection. Cotton fabric is a good option for reliable protection through its folded layers, and the majority of store-bought fabric masks are also made of cotton.
Picking the right fabric is the most important factor to consider if you want to make your own mask.
At the same time, it is particularly necessary to have the right size of mask for you. The coverage of your mask should exactly fit your face, and not be hanging loosely over the bottom of your chin.
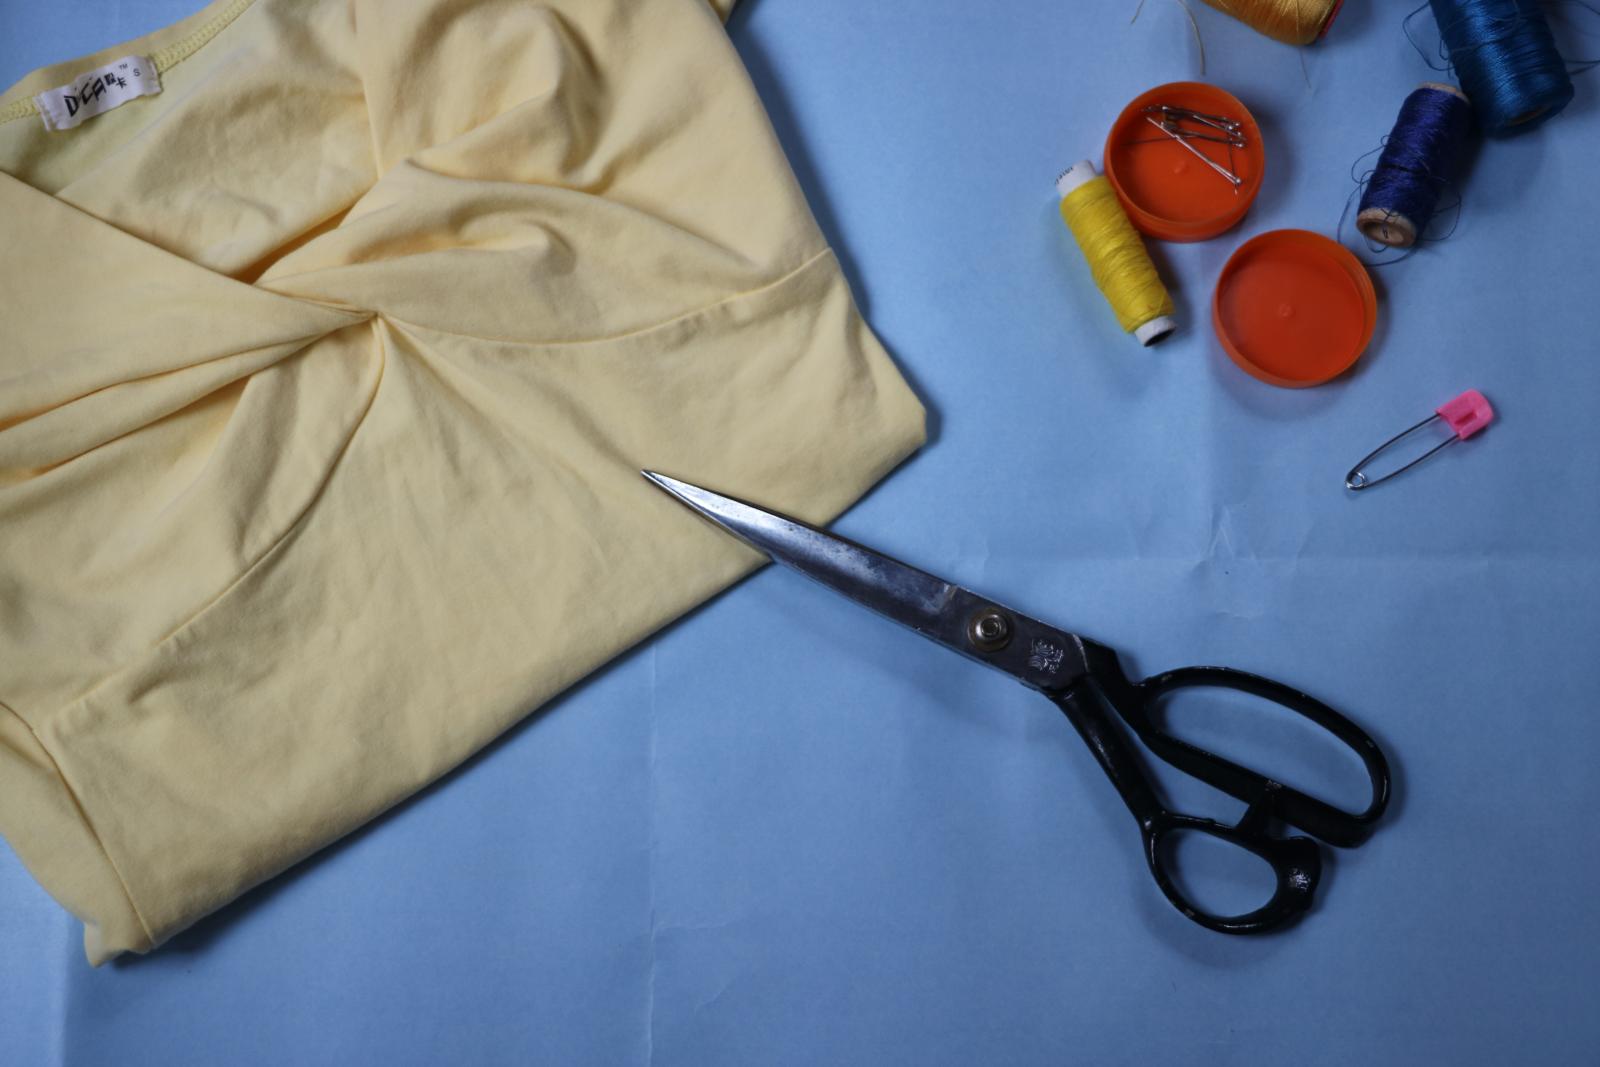
Step 2: Cut, Align, and Sew
Next, it’s time to cut the correct size.
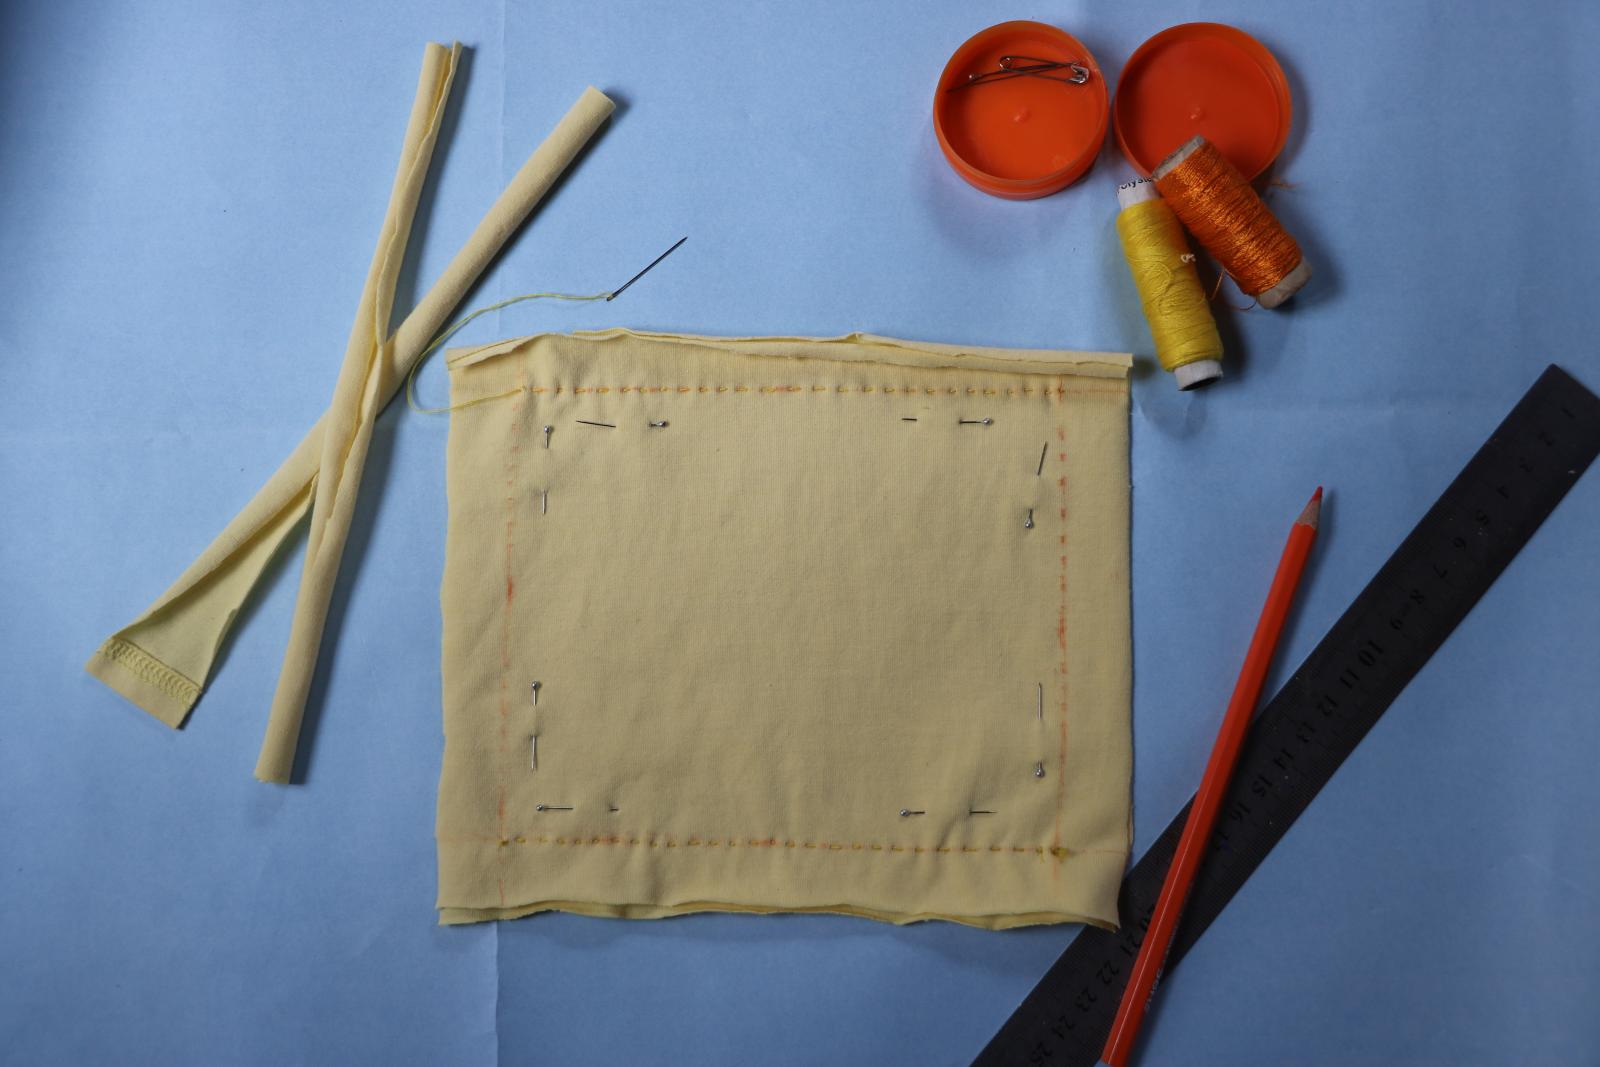
You can either measure the length and width of your face or measure the length of your old mask. Keep in mind that the width should be extended than what you see in a mask since we will need to fold it later in order for it to spread and fit right over the curves of our face. Generally, the average size of a mask is 16×9 cm (length×Width), which after the 6 cm extension of the width becomes 16×15 cm. Alongside this, you might have to reduce a couple of centimeters depending on the size of your face, more if you’re making it for your kids.
As you draw out the lines of your measurement on the shirt or fabric using a pencil and scale, make sure you leave behind a 1 to 2 cm space outside the lines. That way it will be more convenient for you to sew and secure your stitches like shown in the picture. Cut them out using a sharp pair of scissors. You will need two pieces of cotton fabric of this sized cuttings, and one-piece of silk or chiffon fabric of the same size.
Then, place the silk fabric on the bottom and compile the rest two pieces of cotton fabric on the top. Align all the pieces together and pin them with each other using a couple of fabric pins.
While you’re at it, cut off two pieces of long strands, 20cm long and almost 3 cm wide, from the remaining t-shirt or your leftover fabric in order to make the straps.
Moving on, take your similar colored thread and start sewing across the length of your markings. Make sure you only sew the length part of your mask at this point and leave out the width still open so you can turn it around on the correct side later.
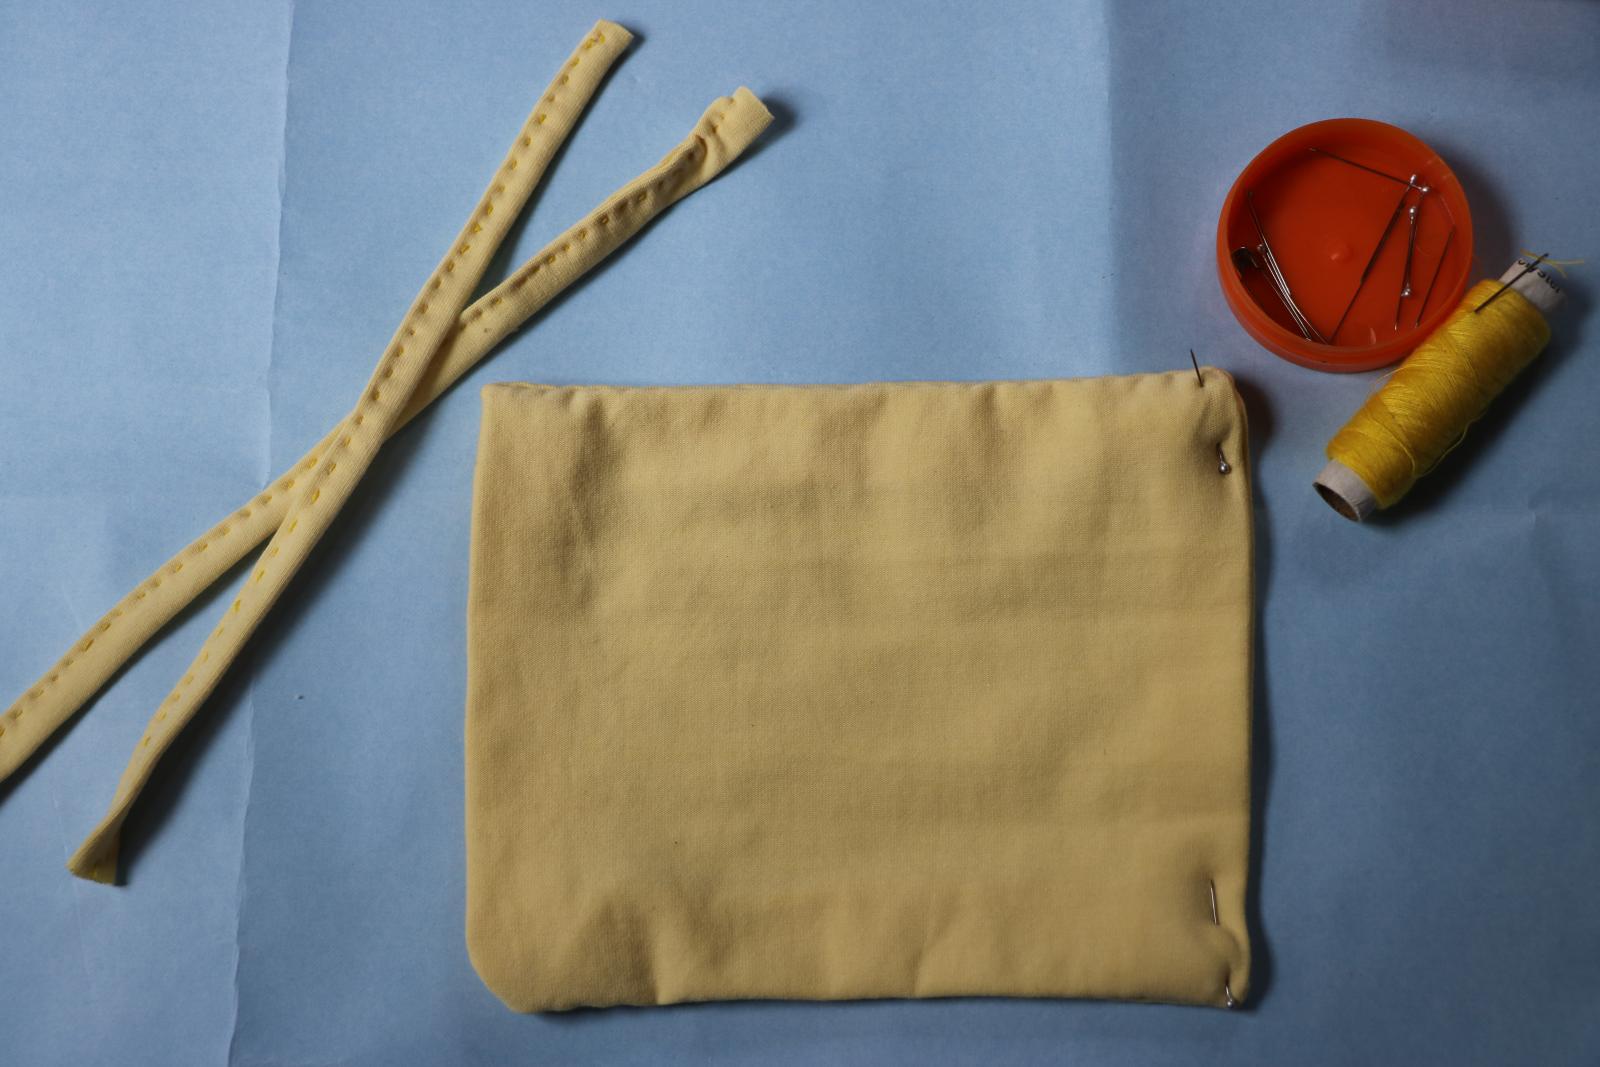
Step 3: Turning it around
Now that you’ve stitched up the two sides of the length, its time to turn it around.
Carefully, turn the fabric around by placing your fingers between the top two layers of cotton, making sure that, after turning it to the correct side, your silk fabric layer lies hidden in between, and the two cotton fabric layers sandwich it.
Then, as you can see, the two sides are neatly sewn from the inside and the remaining two sides are still raw cut. Now precisely fold in the extra fabric on either side of the mask inwards so that the raw sides are completely hidden in the middle and the edged of the width look neater.
You can iron it once and secure the foldings with some fabric pins again so they remain secure for you to continue with the further steps
On the side, fold the straps along their width, such that the folded width of the strap becomes about 1 cm wide, and sew it across in a way that all the sides are neatly edged and no raw sides are out of place.
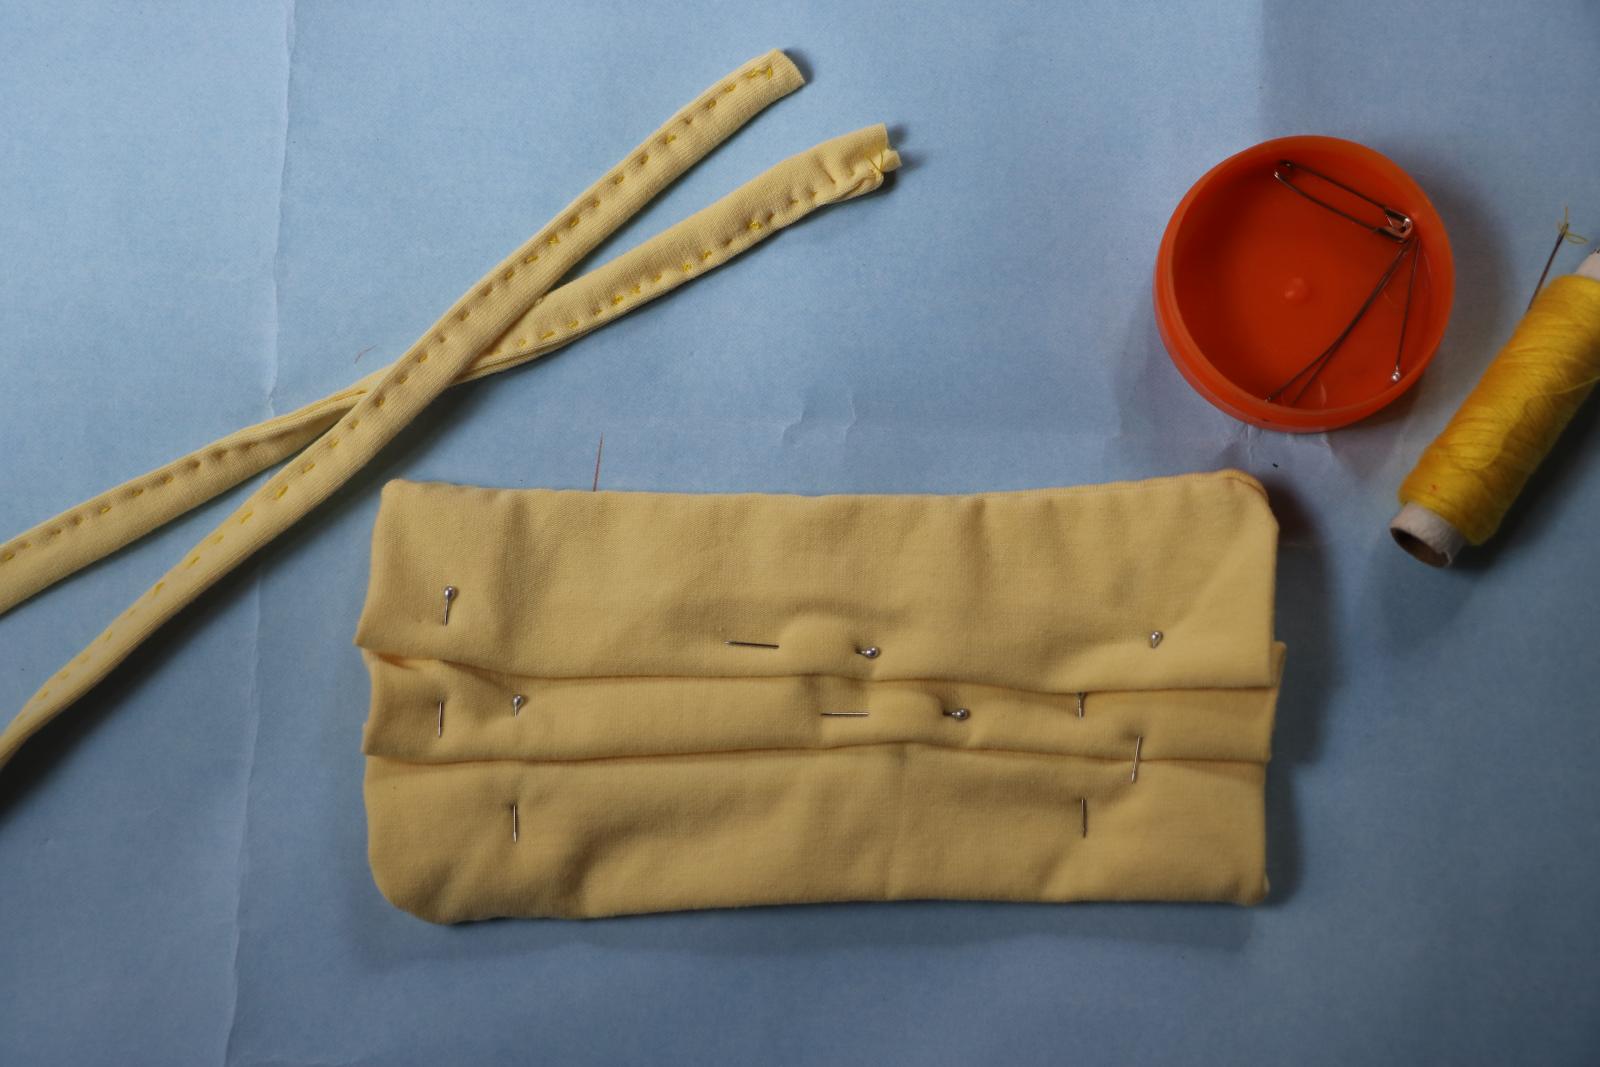
Step 4: Folding the Width
After you’ve successfully folded the edges of the width, now you need to fold your product a couple of times along the length as shown in the picture.
This is another important part to think about as you need your mask to perfectly fit the shape of your face and not let it go out of place when you are moving your mouth.
Start folding your mask in 2 places across the length. Slowly iron over the foldings and pin it in place so it remains secure and doesn’t unfold on its own.
Step 5: Attaching the Straps
Finally, we sew the remaining sides and attach the straps!
Using a piece of string, measure how long of a strap your face might need by placing it around your ears in a way how mask straps are supposed to be. If your fabric is not too stretchable, you need to make sure to measure the perfect size. But if your fabric is stretchable, it’s okay if the size becomes a little smaller. Then, mark your correct measurements on both the straps, making sure they are equal for both of them.
Now slowly insert the straps in the corner of the width, in between the two cotton fabric, such that your markings lie aligned with the edges, and sew along the width. As you’re about to reach the end, insert the other side of the strap, again, until the marking, and finish the stitched by sewing through the other end of the strap. For extra security, you can sew across one more time beside your first tow of stitches and run your needles and threads a couple of times on the corners where the strap is attached.
Repeat the process on the other edge of width, and voila, there you have it, you’re own homemade mask!

